Welcome to Quilt, the powerful screenshot-to-PDF tool built natively for macOS. Whether you're a student capturing lecture slides, a researcher archiving web content, or a professional documenting workflows, this guide will have you creating beautiful PDFs in minutes.
What You'll Learn
- How to download and install Quilt on your Mac
- Taking your first screenshot capture
- Using scroll capture for long content
- Automating captures with key press and click actions
- Exporting to PDF, GIF, and other formats
1. Download and Install Quilt
Getting started is simple. Quilt is a native macOS app that runs on both Intel and Apple Silicon Macs.
System Requirements
- macOS 14 Sonoma or later (including macOS 15 Tahoe)
- Intel or Apple Silicon processor
- About 50MB of disk space
Installation Steps
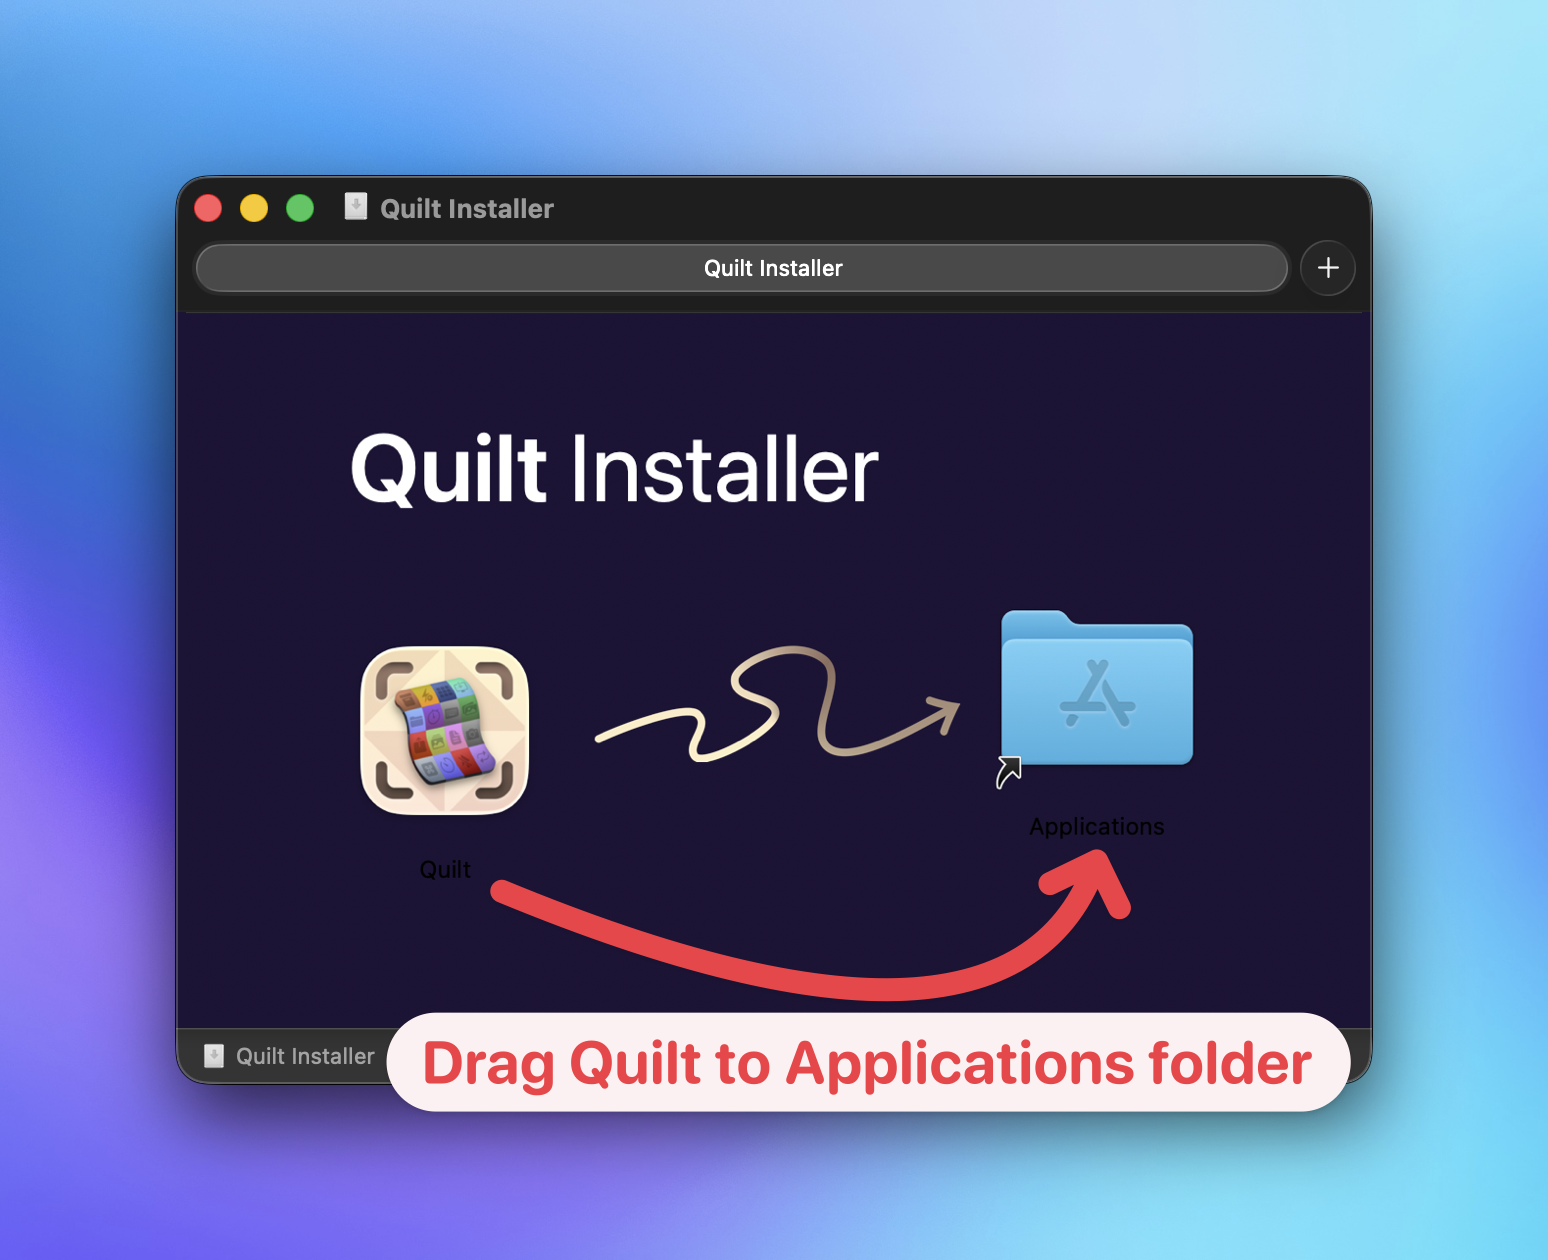
- Download the installer from the Quilt website
- Open the .dmg file and drag Quilt to your Applications folder
- Launch Quilt from Applications or Spotlight (⌘ + Space, then type "Quilt")
Tip: On first launch, you may need to right-click and select "Open" to bypass Gatekeeper, since Quilt isn't distributed through the Mac App Store.
2. Grant Permissions
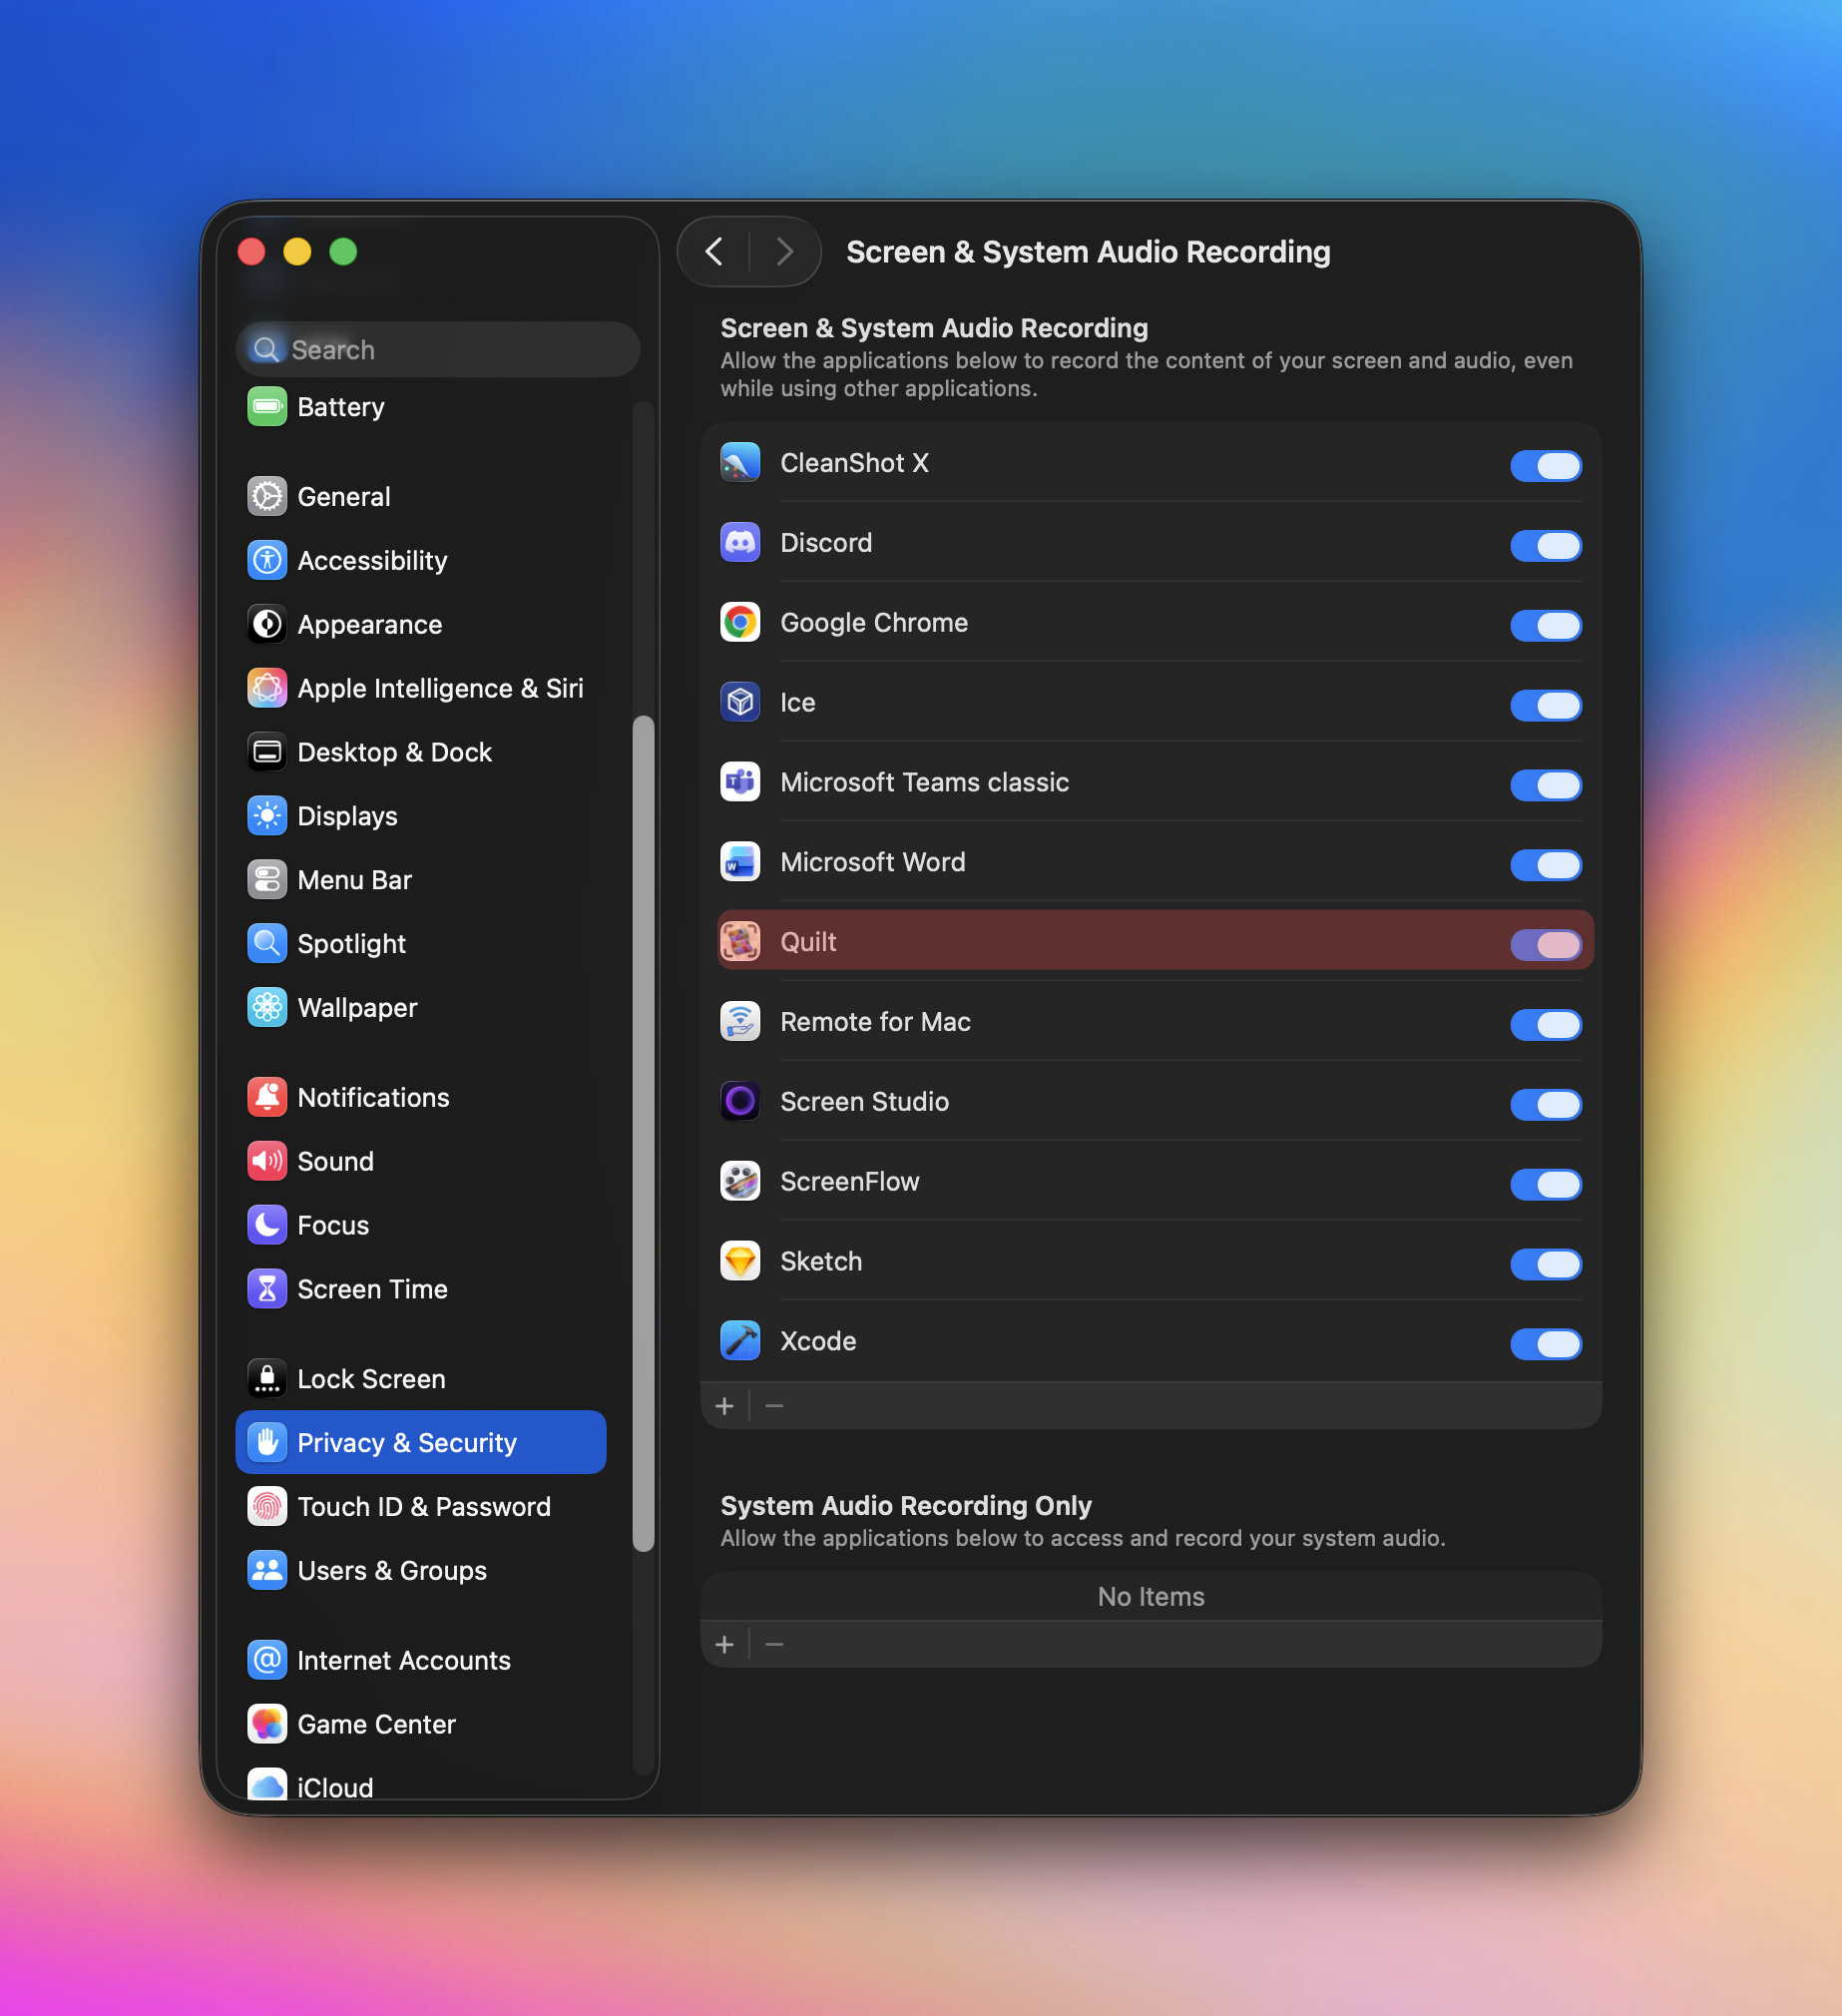
For Quilt to capture your screen, macOS requires you to grant Screen Recording permission.
- When prompted, click Open System Settings
- Navigate to Privacy & Security → Screen Recording
- Toggle Quilt to enabled
- Restart Quilt if needed
3. Your First Capture
Now let's capture something! Quilt's workflow is simple: Select → Capture → Export.
Step 1: Open the Source Picker
Launch Quilt and you'll see the main window. Click the capture button or use the keyboard shortcut to open the source picker.
Step 2: Select Your Capture Area
The source picker shows all windows in your current Space. You can:
- Click a window to select it entirely
- Draw a custom rectangle to capture a specific area
Step 3: Configure Your Capture
Before capturing, set your preferences:
- Number of shots: How many screenshots to take
- Countdown: Delay before the first capture (Pro: customizable)
- Interval: Time between each shot
Step 4: Start Capturing
Click Start Capture and Quilt will take screenshots based on your settings. A progress bar shows your capture status.
4. Scroll Capture (Pro Feature)
Need to capture a long webpage, article, or document? Scroll Capture automatically scrolls and stitches content into one seamless image.
How to Use Scroll Capture
- Select Scroll Capture mode
- Draw a rectangle around the scrollable area
- Click Start — Quilt scrolls and captures automatically
- Review the stitched result in the gallery
Perfect for: Long articles, social media threads, chat conversations, and full-page designs.
5. Automate Your Workflow
Quilt can automatically perform actions between screenshots — perfect for capturing e-books, presentations, or any content requiring navigation.
Automation Options
- Key Press: Automatically press any key (like → or Page Down)
- Mouse Click: Click at a specific location
Example: Capturing an E-Book
- Open your e-book in Apple Books or another reader
- In Quilt, set the number of pages to capture
- Enable Key Press automation with the right arrow key (→)
- Set interval to 1-2 seconds (to allow pages to load)
- Click Start and let Quilt do the work
6. Review and Organize
After capturing, your screenshots appear in a gallery view where you can:
- Drag and drop to reorder pages
- Quick Look (press Space) for a closer view
- Deselect unwanted shots before export
- Delete screenshots you don't need
7. Export Your Content
You're almost done! Now export your captures in the format you need.
Export Options
- PDF: Documents, archives, sharing (with optional OCR for searchability)
- GIF: Animations, tutorials, social media
- ZIP: Bulk image downloads
- Individual Images: PNG, JPEG, HEIC, or WebP
Creating a Searchable PDF (Pro)
With Pro, enable OCR to make your PDF text searchable:
- Select Export to PDF
- Toggle Enable OCR
- Choose compression settings if needed
- Click Export
Note: OCR runs entirely on-device using Apple's Vision framework — your content never leaves your Mac.
Pro Features Worth Exploring
The free version of Quilt is powerful, but Pro unlocks even more:
- Unlimited screenshots per capture (vs. 15 in Free)
- Customizable countdown timer
- Scroll Capture for long content
- Background capture mode
- On-device OCR for searchable PDFs
- Custom filename templates
- PDF compression settings
- Hide cursor option
Next Steps
You're now ready to capture and export like a pro! Here are some ideas to try:
- Capture a recipe from a website and save as PDF
- Archive a Twitter/X thread using scroll capture
- Document a software workflow for training materials
- Save Apple Books pages as a portable PDF for offline reading
Have questions? Reach out to our support team — we're happy to help!